Category Archives: Food

Classics: Taco/nacho night

Apparently taco night is a standby in, like, 90% of families. Not ours—we used to have nachos for dinner on Sunday nights on occasion, but never ever tacos. Still, I like the “assemble your own” idea, and there are few things easier than cooking up some seasoned meat, heating the shells, and putting out all the rest of the goodies. Besides, now that I’m going to be a mom, I have an obligation to develop a set of go-to meals, right? (It’s a boy, by the way!)

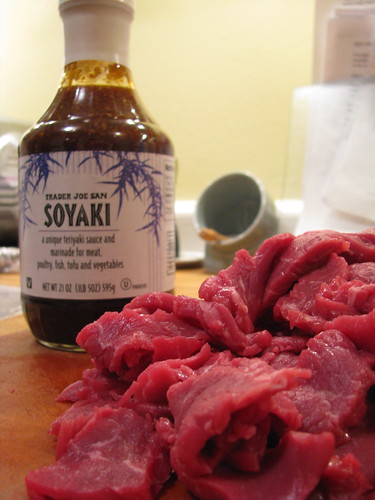
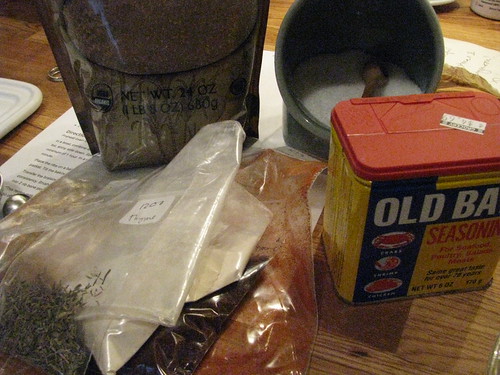
I used shells from Trader Joe’s (which also supplied guacamole and salsa) and an organic seasoning mix from Whole Foods. I much prefer the taco seasoning powder from Christina’s Spice Shop in Inman Sq., but I used it all up making chili, oops! I cooked a pound of beef so I’d have lots leftover for nachos!
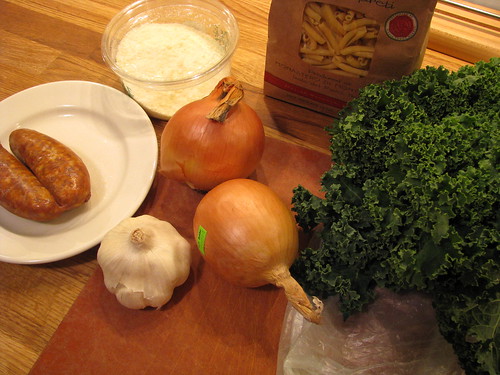
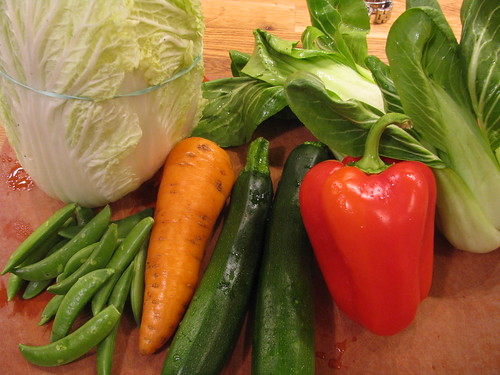
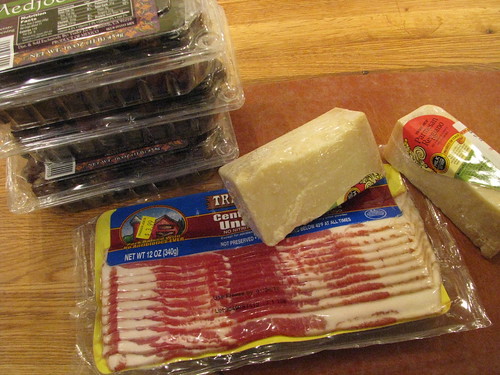
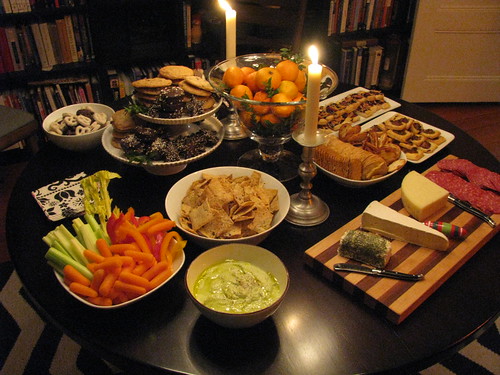
The goods:
Tacos

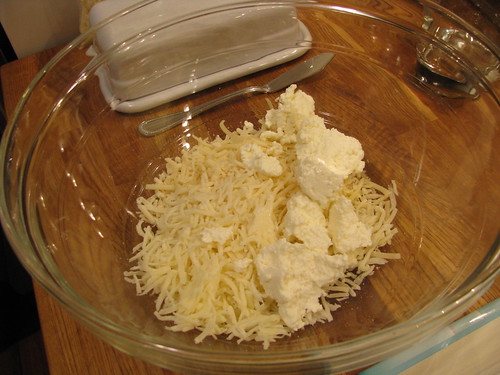
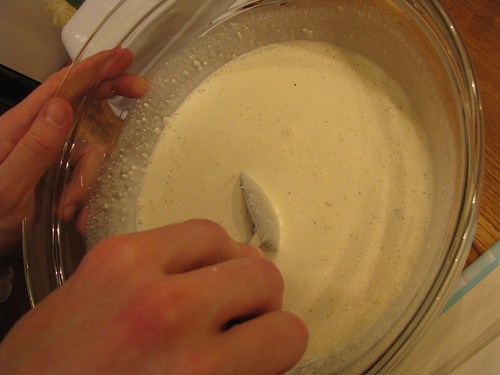
My mom always used yogurt instead of sour cream, and I do the same, but with greek yogurt, which mimics the texture so well Ben didn’t believe me the first time.

Tacos

Tacos

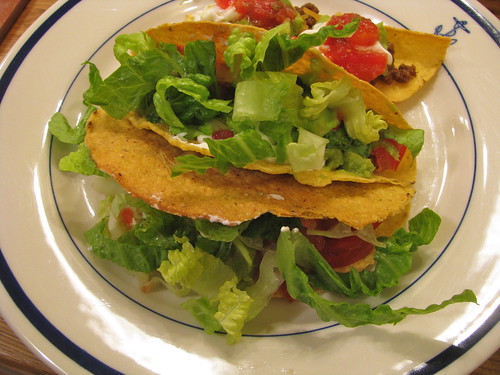
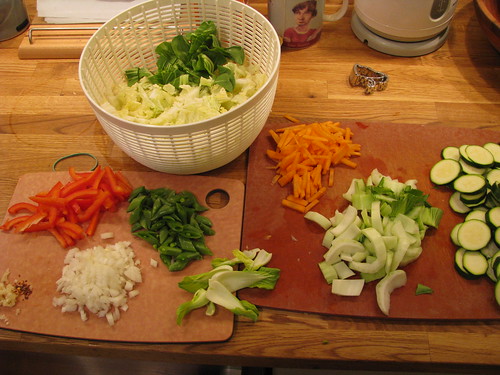
Delicious, if messy, and required about 20 minutes of total prep, including washing and cutting up lettuce and tomato. If I can find a source for good tortillas we’ll do soft tacos next time.

A few nights later it was, um, The Oscars. (I know, I’m always behind. The problem is that I don’t have a single solitary photo of any meals since then. We’ve been all over the place, and barely eating at home, and when we have I’ve been slacking and doing things like Rising Moon ravioli. Next week appears to be better; anyone have anything they’d like to see cooked?)

ANYWAY. The Oscars! Party on the futon! Nachos for dinner! I was in the middle of a constantly-ravenous phase, and I accidentally made such enormous, filling plates of nachos that, well…we’ll get to that.

What I used:
-Everything from the tacos (guacamole, salsa, tomatoes, lettuce, meat, yogurt)
-Chips
-Refried beans. This was the one-step-too-far decision.

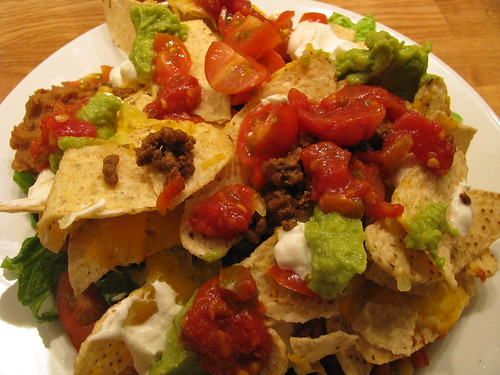
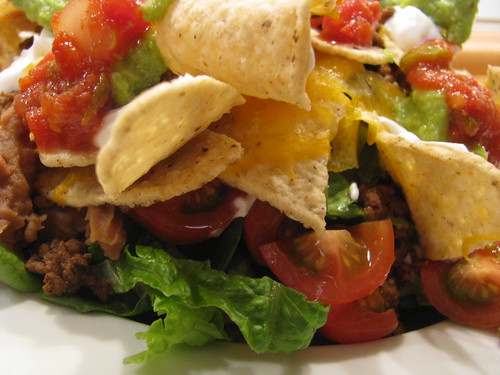
I put a layer of nachos in the bottom of a pasta plate, then heaped lettuce on top and dabbed on guacamole, salsa, beans, yogurt, and covered it with meat and tomatoes.

Nachos

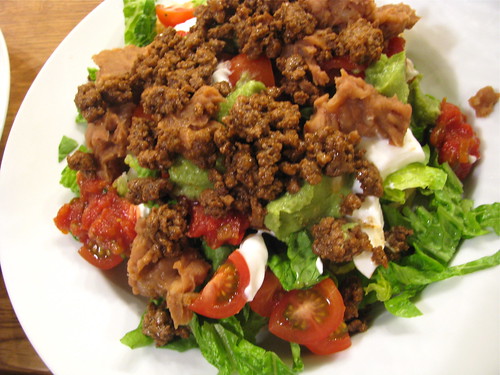
Then another layer of the chips/cheese, and more of all the toppings:

Nachos

Side view: It’s a salad! Sort of.

Nachos

Uuuugh. So tasty! So easy to just. keep. eating. We could have split one of those plates; instead we each ate our own. Yikes. Poor Ben ate and ate and ate and finally turned to me and said “what are you doing to me?”

And then he fell asleep.

Pasta, fully loaded

Last month, while on our annual visit to dear friends down in Sarasota, we enjoyed a massive and fabulous meal at a Tapas restaurant in town. (I also got to be the designated driver for the first time, thanks to the restaurant’s slight delay in seating us and the decision of the non-pregnant members of our party to work through the several bars in the building en route to our table.)

Everyone else was in a meat mood, but the highlight of the evening for me was a sauteed spinach dish with dried figs, honey and onions. The onions seemed scorched, or something, which gave them a delicious smokiness to offset the sweet figs and honey. I had trouble releasing the dish to be shared.

Once we were home, I started thinking about scorched onions and other ways to use them, and I settled on a kale/sausage/onion pasta dish. I was going to cook the pasta absorption style, but then I remembered Smitten Kitchen’s post about spaghetti with cheese and pepper, and figured I could use that as my base.

Ingredients:

IMG_5689

I started by cooking the sausage (out of the casings) until it was nearly done. I wiped most of the grease from the pan (but not all of it, for which I paid), and started the onions. My mom and I had discussed it and thought a dry pan was probably the best bet if I wanted a scorch on the onions before covering them and letting them cook through with the steam from the liquid they would release.

IMG_5690

Yeah, the deliciousness left over from the sausage was not a “dry pan.” That all started to really burn on, pretty quickly. In fact, the pan turned completely black. Also a Swiffer Wet-Jet is not ideal for turning off a smoke alarm, FYI. Awkward handle shape.

IMG_5691

And yet the onions didn’t really get the smoky flavor I was looking for. On further reflection the next day, Mom and I agreed that the restaurant was almost certainly using a flat-top to cook the onions. Maybe I’ll try a griddle next time? And NO OIL?

Remaining ingredients:

IMG_5692

I had to wash the pan after the onions were done; it actually scraped clean pretty easily since I added boiling pasta water (pre-pasta) to it while it was hot, and then scraped off the blackened stuff. Tip: Never let a badly burnt-on pan cool before filling it with HOT water to soak. Scrape while it’s all still hot and you will save yourself endless scrubbing.

After a cursory wipe-down, I cooked the kale quickly. Meanwhile the pasta was cooked.

As per the recipe, I heated oil in the pasta pot, added back the pasta, and added in some of the pasta water. In went the cheese, pepper and butter:

IMG_5693

IMG_5695

Not really coated enough. Less pasta water next time. More cheese.

In went the kale, sausage and onions.

IMG_5696

Funny how thinly stretched a mountain of onions and kale can seem once you add them to a pound of pasta. I could definitely have used at least one more sausage, though I was using hot ones from the freezer and it would have been too spicy for our wimpy palates with more.

IMG_5699

Great flavor combination (obviously; it’s one I use all the time…branch out, Kate!). I left the kale a little less cooked than usual so it had great chew against the pasta. The onions were more caramelized-tasting than I wanted, but overall it was delicious.

I really need to work out the key to those onions, though. I want that spinach dish.

The basics: Split pea soup

I was going to post a pasta recipe today, but the view from my window (grey skies, something between snow and rain) is one that requires soup. This is one of those recipes that I just have to post in case you don’t have a favorite already. Split pea soup is the easiest thing in the universe to cook, and cheap as anything, but so comforting and filling that it always feels like a treat to me.

When I was a kid split pea was my favorite—maybe because it was one of the rare times we ate bacon, which my mom cooked and cooled tantalizingly on the counter, and then crumbled onto each bowl. If you’ve ever lived in the Pacific Northwest you know that there is a certain kind of squelching rain that comes every so often in the winter and lasts for days on end, different from the usual misty stuff and much colder. The exact right thing on those days is to come home and smell the house full of peas and ham and bacon. Sometimes we’d have grilled cheese (rough country bread and good cheese) to dip in it, sometimes toast with butter. I always sang “Pease porridge hot” in my head and thought of “Pease porridge in the pot, nine days old” and how we never, ever let it go that long. Leftovers were always gobbled up quickly. I think Laura says the same thing about bean soup in one of the Little House books, as a matter of fact.

And take it from me, split pea soup actually is still pretty delicious cold.

This is the recipe my mom used when I was a kid, and which I still prefer. She has moved on to a Jacques Pepin recipe with herbes de provence and a bit rougher texture, but this will always be split pea soup to me:

Split Pea Soup
from James Beard

2 cups dried split peas
2 quarts water
1 meaty ham hock
2 cloves garlic, peeled & crushed
1 medium yellow onion, peeled, left whole
2 cloves (stick in onion)
2 stalks celery, cut in half, cross-wise
2 carrots, peeled & cut length-wise
1 bay leaf

Spread out one cup of the split peas at a time on a cookie sheet and pick over for tiny stones or sticks. Rinse with cold water & drain.

* Put all ingredients in a pot, bring to a boil, reduce to simmer.
* Cook a couple of hours until peas are soft.
* Remove ham hock and cut off meat; set aside.
* Throw away onion with cloves, garlic, celery & bay leaf.
* Puree peas & carrots (or not if you don’t want carrots)
* Return soup to pot, add ham bits, salt & pepper to taste.
* Serve hot with cornbread.

I was low on onions, didn’t have celery and couldn’t find a bay leaf on the day I made this batch. Sure, it would be even better with the right stuff, but it was still delicious. Prepping this soup takes all of five minutes.

I was also using half yellow and half green split peas. (It was gross out and I was not making a trip to the store.) Rereading the recipe just now, I realized I never rinse the peas! Oops.

IMG_5682

Despite its healthy appearance, this was a sadly disappointing ham hock. In fact, I have had enough trouble getting ham hocks (Whole Foods has to special order them. Honestly!) that when I found them at the normally-wonderful Savenor’s I bought four, two for the double batch I was making at the ski house, two to freeze for later. I’ve now used three of them and they have been horrible, with virtually no meat. Normally I get about a half cup of ham off the hock at the end, to chop up and put back in; these have given me just a few splinters. So weird!

IMG_5684

(Note the tiny halved onions because all I had were little sprouting ones. Leave the onion whole, normally, which makes fishing it out far easier.)

IMG_5685

Cooked, with ham hock and most of the carrots removed. Pre-blending. I use my immersion blender right in the pot and it gives me lovely silky soup.

IMG_5686

Like so:

IMG_5688

By the way, this requires quite a bit of salt and pepper at the end, especially if you don’t have a ton of ham to add back in. Keep tasting and stirring and adjusting. Hmm, it’s been a couple weeks since I made this… Time for another batch soon.

P.S. I joined Formspring, so head on over and ask me a question! http://www.formspring.me/kateflaim

Stupidly simple fresh pastries, no work required

This is a lazy thing to post about, but I consider it a public service announcement.

You guys. I don’t know how many of you share my emotions on the subject of pastry, but I bet it’s a high percentage. I can’t get enough of good buttery pastries, mainly of the flaky croissant family, and pain au chocolat, with a good cup of coffee, is just one of those perfect foods. Ages ago I’d read somewhere that Trader Joe’s*, that home of genius food shortcuts, sells a good frozen croissant and pain au chocolat, ready to proof and bake at home. I always forgot to actually buy any, but last week they jumped out at me and I was eager to try them over the weekend.

Then I had an appendicitis scare, spent Friday night and Saturday in the hospital, and didn’t get to eat any real food for a little while. But that’s all in the past now! Everything is fine! I am a medical mystery! And I wanted to reward Ben for his frenzied trip home from a business trip to spend the night in the hospital with me, so before I fell into my own wonderful bed Saturday night I set the pain au chocolat out to proof. I was in no state to find my camera, and I failed to take photos of the little cigar-shaped frozen pastries or their box. Suffice it to say, the box warns that you need to leave four to five INCHES between them on the sheet, before leaving them out overnight to rise. I felt weird leaving them on the counter uncovered, as directed, so I popped the tray in the cold oven for a bit of protection from the elements.

Sure enough, when I woke up Sunday morning, the cigars were crazily puffy:

IMG_5715

And after 22 minutes or so in the oven:

IMG_5716

IMG_5717

Wow, those were so good. REALLY flaky and light, very buttery, nicely bittersweet chocolate. In fact, they’d puffed up so much they were almost hard to eat! BTW, you can add an optional egg wash for added shininess. I forgot, and as you can see mine looked pretty much just like the box.

Here’s what the box looks like (thank you interwebs for filling in here):

Image via Just Insomnia, where the blogger actually met the baker who makes the croissants–apparently he does desserts for places like Dean & Deluca, too. This explains a lot.

*I swear, Trader Joe’s isn’t paying me, even though I’m pretty sure almost every post I tag “good stuff” talks about something from there. I just love them.

Mega-stir fry vegetable explosion

Thanks to everyone for your well-wishes and sweet comments on the last post!

I have definitely noticed a shift in…not tastes, so much as food desires since I got pregnant. Well, in the last few weeks since I started eating again, anyway. I have never been a girl to turn up her nose at things like donuts (and I am famous for my love of fried food), but now I find myself fixating, even if I don’t end up eating the thing in question. I’m also really bothered by the food ads on TV, which for the first time ever are making me want whatever they show–McNuggets, Pepperidge Farm garlic bread, etc. I haven’t followed through, but it’s weird for me to sit on the couch and think, “Chicken Nuggets! Brilliant idea!”

The good news is that I also think “Kale! Best idea EVER!” So things aren’t too out of whack. In fact, the first real meal I cooked once I stopped resorting to premade pizza crusts and extra-simple pasta dishes was a gigantic stir fry. I got the idea in my head, went to Trader Joe’s and Whole Foods, and came home with everything I had spotted that seemed remotely appealing or logical in stir fry. To wit:

Stir fry

Also some beef, which I froze for an hour or so and sliced as thinly as possible before marinating in a new TJ’s discovery:

Stir fry

I had planned to make my own marinade/stiry fry sauce, but I spotted this one and the ingredients were literally exactly the same as what I planned to use: Soy, ginger, garlic, sesame seeds, etc. Shortcut time! I found it a bit sweet, in the end, so I’ll cut it with rice vinegar in the future.

As with any stir fry, cutting up all the vegetables is the time-consuming part.

Stir fry

I cooked the beef about 80% first, and then set it aside. Then the vegetables: The general rule is to get your oil hot hot hot, cook your aromatics (garlic, ginger, red pepper) quickly, then add the hardest vegetables, which will require the longest time to cook. I’d been lazy and cut the zucchini a bit thick, so that went in first with the onion, before my very tiny carrot and pepper matchsticks.

Stir fry

Those were next, followed by the peas.

Stir fry

Then the bok choi stems:

Stir fry

Then I added the beef back in to finish cooking, and added in some of the sauce (obviously fresh, not what I’d used to marinate):

Stir fry

And finally the bok choi and napa cabbage, just to wilt for a second.

Stir fry

All done!

Stir fry

Probably about 5 minutes total, but timing varies depending on your stove, vegetables, etc.

We ate it with rice. Actually, I ate it with rice for about three days, because that was quite a bit of stir fry.

Stir fry

Yum. Maybe I should make another batch.

Serious Pie

I just haven’t been cooking, guys. Ben has been super busy and we haven’t had a lot of dinners at home, and when we have I’m afraid I’ve been doing a lot of pizzas (built on crusts from WF, agh) and salads. I keep going to iPhoto looking for something to upload and blog but I’m running on empty, here! (Literally. I think the nutritional balance of the Flaim household has dropped significantly over the past month or two.)

I truly, truly hope to get things back on track soon, but meanwhile how about a slice of pie, made by the genius pie fairies at the Agawam Diner in Rowley, MA up on the North Shore:

Coconut Cream Pie

Oooooh yeah. That’s coconut cream pie, homemade, and the size of my head. Other options included, on Sunday, custard, chocolate cream, chocolate mousse (more like a cake), “squash”, banana cream, apple, strawberry-rhubarb, and enough others that once I’d fixed on coconut cream I sort of tuned out. In the past the crust has been so-so, but this time it was great.

The Agawam Diner is our favorite mid-ramble lunch spot–it’s a classic 50s shiny metal diner with classic diner food (Ben most recently had chicken salad on a buttered and grilled NE-style hot dog bun), service that varies from lovingly gruff to surly, and amazing prices. And pie. Michael Stern reviewed it for Road Food a couple years ago.

Highly recommended.

Baked cauliflower pasta

My mom gave me Hungry Monkey by Matthew Amster-Burton for Christmas. It’s a fun food memoir, recording his adventures in eating with his daughter during her toddler and preschool years. It’s also full of tasty-sounding (and kid-friendly) recipes, most of which I probably won’t be trying for years and years. But one early-January night the siren call of cauliflower combined with the dismal weather and inspired me to make his baked pasta with cauliflower. It’s from the White Foods chapter, I think.

This is a really simple recipe, but a little heavy on the fatty ingredients. I also found that it wasn’t a great re-heater; it’s one of those cheesy dishes that gets pretty greasy when it’s heated back up. Next time I will make a half batch in an 8×8 pan instead of a full batch in the 9×13.

Baked Pasta with Cauliflower
From Hungry Monkey (He says it’s based on a recipe from the fabulous Cucina Simpatica, which is one of those cookbooks I’m always cooking things from and yet don’t own. Must remedy.)

2 cups heavy cream
1 1/2 ounces (1/2 cup) shredded pecorino Romano or Pamesan
1/2 cup shredded low-moisture whole milk mozzarella
2 tablespoons ricotta (I asked at the cheese counter at Whole Foods and they gave me a bit of the bulk stuff that they repackage in back)
1 1/2 teaspoons kosher salt
12 ounces penne or farfalle
1 medium head cauliflower (~1.5 pounds), cut into small florets
4 tablespoons butter
I also added some red pepper flakes; the dish was still a tad bland.

Preheat oven to 500 degrees. Stir together the cream, cheeses, and salt in a large bowl.

Creamy cauliflower pasta

(Ben did this part)

Creamy cauliflower pasta

Boil the pasta and cauliflower together in salted water for four minutes, and drain.

Creamy cauliflower pasta

Creamy cauliflower pasta

Toss the drained pasta and cauliflower into the bowl with the cream and cheeses. Combine well. Transfer into a 9×13 baking dish and dot the butter over the top (also some cheese, if you’re me).

Creamy cauliflower pasta

Bake 10-12 minutes (he actually recommends using 4 small dishes for individual servings; I used a big one and baked about 15 minutes, I think), or until some of the pasta is well-browned and crunchy. Serve immediately.

Creamy cauliflower pasta

It was crucially important to serve a sharply-dressed (as in tangy, not natty) salad on the side, since the pasta was so creamy and rich.

Creamy cauliflower pasta

I really did enjoy this, but I want to play around with the technique. I think I could reduce the amount of cream, maybe subbing in some whole milk? It’s essentially absorption pasta cooked in the oven with a brief par-boil to get it going. Adding sausage and kale would be terrific, too.

Oven ribs and corn muffins to chase away the chill

Bless grocery store sales. I would choose baby back ribs over nearly any other food, but I’ve never cooked them because I was too intimidated. But when I saw ribs on sale at WF for $4.99 a pound I couldn’t resist. I got the ribs home and did some quick googling, which led me to Alton Brown’s “Who Loves Ya” baby back rib recipe. I laughed at the name until towards the end, when I turned to Ben and said “Who loves you?” as I pulled a rack of ribs out of the oven. So there you go, the cheesy name has a reason.

[Note: I accidentally got my camera stuck on a 1600 ISO for a while earlier this month. As a result, there are some truly terrible photos in the pipelines. Grainy and awful; I’m sorry!]

Oven ribs

There are quite a few ingredients in the dry rub, but everything was super easy and quick, actually. My mom asked if I really bought all the things the recipe calls for, and I did since most were in the bulk spice section. I only skipped the jalapeno seasoning, which I didn’t find and didn’t search for particularly hard.

Once the rub (which contains brown sugar salt and a bunch of chili powder, cayenne, onion powder, etc…) was mixed up, I covered the ribs on both sides and bundled them up in tinfoil.

Oven ribs

Oven ribs

Then they rested in the fridge for a while (I didn’t leave enough time, so I only gave them an hour), and when it was time to cook I mixed the braising liquid (white wine vinegar, white wine, worcestershire sauce, honey, garlic) and heated it in the microwave.

Oven ribs

Then Alton says to open one end of the foil packet and pour in the liquid. To my shock, this actually worked. (And this is the worst photo of them all, I’m afraid.)

Oven ribs

The ribs went in a 250 degree oven for 2 1/2 hours. Towards the end of cooking, Ben and I made up a batch of corn muffins (recipe at the end of the post). Note the fancy new wiper-mixer-blade thing Ben got for Christmas! It makes HORRIBLE squealing sounds as it rotates until there are wet ingredients added, but then it scrapes down the sides of the bowl perfectly.

Corn muffins

Corn muffins

Corn muffins

Those baked once the ribs were out, since I needed a much hotter oven.

Corn muffins

Meanwhile, the cooked ribs were out and I poured the liquid out into a pan to reduce into a glaze.

Oven ribs

Oven ribs

Oven ribs

The reduced glaze went on the ribs, which then went back in the oven for a quick broil to caramelize.

Oven ribs

Cut them up and it’s time to eat!

Oven ribs

I mean, seriously. Who loves you?

Oven ribs and corn muffins

The ribs were very tender, flavorful and delicious. They weren’t smoky, obviously, but for an oven recipe? Excellent. Also A+ leftover, cold.

Corn muffins
(From Ina Garten; my mom is going to let me know which book)
Over Christmas Mom made a batch of these with raspberry jam on the tops–not as much as the recipe recommends, just a dab. They were sensational; not dry and with a terrific crunchy toastiness after being heated up in the toaster over. I made them for this dinner without the jam and then froze half the batch (it made 16 muffins; I used those foil liners that stand up on their own for the extra).

“3 cups all-purpose flour
1 cup sugar
1 cup medium cornmeal
2 Tablespoons baking powder
1 1/2 teaspoons salt
1 1/2 cups milk
1/2 pound unsalted butter, melted and cooled
2 extra-large eggs
3/4 cup good raspberry preserves (if you want)

Preheat the oven to 350 degrees.

Line 12 large muffin cups with paper liners. In the bowl of an electric mixer fitted with a paddle attachment, mix the flour, sugar, cornmeal, baking powder, and salt. In a separate bowl, combine the milk, melted butter and eggs. With the mixer on the lowest setting, pour the wet ingredients into the dry ones and stir until they are just blended. Spoon the batter into the paper liners, filling each one to the top. Bake for 30 minutes, until the tops are crisp and a toothpick comes out clean. Cool slightly and remove from the pan.

(If you want the jam:)
After the muffins cool, spoon the jam into a pastry bag fitted with a large round tip. push the tip of the bag through the top of the muffin and squeeze 1 to 2 tablespoons into the middle. Repeat for each muffin.”

I forgot the dates!

I completely forgot to post the making-of pictures for the dates I mentioned in the last post. These are adapted from Suzanne Goin’s restaurant AOC, but they are so seriously simple that you don’t really need a recipe.

(I made 90. That was WAY too many; I cooked about half the following Sunday and took them to a neighbor’s tree-trimming party.)

Holiday party prep

Ingredients:
Dates (Three packets of Medjool dates from Trader Joe’s = 90ish dates)
Bacon (I ended up needing more than three of those packages)
Parmesan cheese (I only needed one of the two hunks I bought)

Holiday party prep

Pit dates if they aren’t already by slitting one side and pulling out the pit. It should release easily.
Cut parm into little logs and put in the date where the pit was.
Push the date back together around the cheese.

Holiday party prep

Holiday party prep

For the bacon I was using, it worked to cut the slab into thirds and wrap one third-slice around each date, securing it with a toothpick. For some reason I can’t find any pictures of the raw wrapped dates, probably because my hands were covered in bacon.

Refrigerate until ready to use.

Cook in a 450 degree oven until the bacon is done, flipping midway through; it took 10-15 minutes for mine but do a test run since your oven may vary. Drain on a paper towel or paper bag. Serve hot, but not immediately or your guests will choke on molten date.

Holiday party prep

I am not actually the biggest fan of these. I just don’t love dates, which I find too sweet and sticky. I prefer the prosciutto-wrapped figs we make on the grill in the summer. But guys, especially, made short work of them!

Fun with Puff Pastry: Last-minute party snacks

Happy New Year! I sincerely doubt that anyone who is hosting a party tonight still needs menu ideas, but just in case I thought I’d share some of the puff pastry tidbits I made for our holiday cocktail party a couple weeks ago. I am of the opinion that pretty much anything involving puff pastry is automatically tasty, so at our first cocktail party back in Hanover, I made piles of savory “palmier”-style nibbles. What I hadn’t taken into account was the fact that children were attending that party. Small children. Children who took palmiers in each hand, squeezed, and then released the torrent of crumbs onto the floor by the table. Rinse and repeat. By night’s end, the carpet was white with crumbs.

This year no kids were coming! I gave the puff pastry another shot, making three different options using good store-bought all-butter frozen sheets from Whole Foods. Missing from all photographic evidence except the table-views are the leek and sausage squares, which were dead simple. I made the topping the night before and then put bits of it on square of puff pastry and baked them. Savory, easy, and people loved them.

Item two: A vegetarian option, using olivada (black olive spread) and roasted tomatoes. I bought both toppings from the antipasto bar at Whole Foods, because I didn’t want to make myself crazy. Here’s how I assembled them: (Please excuse the grainy photos; something went weird with my camera that day.)

Unroll the thawed puff pastry (follow package instructions), figure out how big you want your hors d’oeuvres, and cut the sheet into strips that make sense.

IMG_5375

Spread the olivada (or any other dryish spread of your choice) down the center of each strip, leaving the edges plain, and top with tomato or roasted red pepper bits spaced according to the size of the finished pieces.

IMG_5376

IMG_5377

Cut between the tomato pieces and place individual bites on a baking sheet (I covered everything in foil for easy clean-up.)

IMG_5378

Top with grated cheese (I used parmesan) if you’re into that sort of thing.

IMG_5380

Bake according to package directions until golden brown.

Holiday party prep

I would guess that it took me about 20 minutes to assemble 60+ of these.

The final puff pastry delight, the simplest, the one you’ve made before, and my favorite: Cheese straws. Who doesn’t love a cheese straw? Come on. They are a perfect food. Here’s how you make them, in case you never read a Martha Stewart Entertaining book when you were in middle school. (Ahem. Not that I know anyone who was obsessed with all those little tiny sandwiches and miniature deviled quail eggs and endive straws stuffed with salad.)

Unroll the thawed puff pastry, blah blah blah. Roll it out a bit thinner. Cut it in half. Brush with melted butter. Sprinkle grated cheese (I used cheddar and parmesan) on one half, top with the other half, roll them together.

IMG_5381

Cut the sheet into straws and figure out if you want long or short ones. I went for short to maximize the number from the sheet.

IMG_5382

Holiday party prep

Arrange on baking sheet, twisting each straw as you put it down. Brush with butter and top with black pepper if you want.

Holiday party prep

Bake until golden and delicious and hoard for yourself.

Holiday party prep

Oh fine, let your guests have them. You nice, sharing person.

Here’s most of the food before people arrived:

Holiday party prep

Holiday party prep

(Missing are the bacon-wrapped, parmesan-stuffed dates that I cooked off during the party so they’d be hot. I hated these; too sticky and sweet, but a lot of people gobbled them up. I’ll post the crazy-simple how-to next week. (Impatient? Put parmesan in a date, wrap it in bacon, and bake/broil it until the bacon it cooked.))

Your happy, blurry hostess in a festive apron:

Holiday party prep

And the glowy living room:

I know the last few months have been a bit sparse here at the Girl Reporter. I’ll try to pull myself together in the new year. I hope you all had a safe, happy and delicious holiday season–here’s to 2010! I’m excited about this one.