Category Archives: Food

Mac and Cheese (lots of cheese)

So if you were cooking for someone who had a terrible cold and was very congested and having trouble breathing at night, what would you make? Probably chicken soup or something equally clear and comforting. Probably not Mac and Cheese made with 2.5 pounds of dairy (and 1/2 pounds of pasta). I am not smart sometimes.

But I made poor, suffering Ben this Milk Bomb last week and he’s still alive (and his cold seems to be tapering off), so no long-term harm done.

I remember seeing this mac and cheese recipe in the New York Times a million years ago (back in my Brooklyn days, when I never actually cooked) but I forgot about it until I found it in the Smitten Kitchen archives last week. It is FAST to pull together.

My favorite part of the recipe is how after the ingredients it says things like “Not lowfat.” Thank you, Ms. Moskin!

Creamy Macaroni & Cheese
From the NYTimes via Smitten Kitchen

Time: 1 hour 15 minutes

2 tablespoons butter
1 cup cottage cheese (not lowfat)
2 cups milk (not skim)
1 teaspoon dry mustard
Pinch cayenne
Pinch freshly grated nutmeg
1/2 teaspoon salt
1/4 teaspoon freshly ground black pepper
1 pound sharp or extra-sharp cheddar cheese, grated
1/2 pound elbow pasta, uncooked.

Lots of Dairy:

Let’s look again at that pound of extra-sharp cheddar (Tillamook: Go Oregon!):
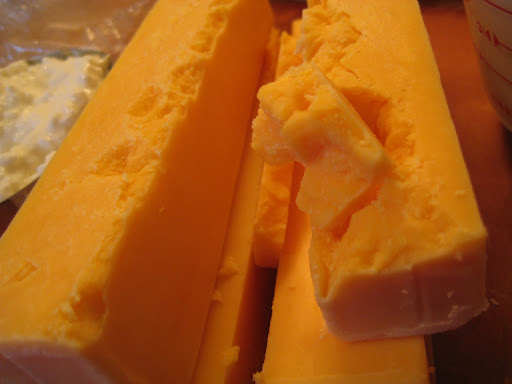
And behold, once again, the magical powers of the Cuisinart’s grating abilities:

A pound of cheese grated perfectly in 30 seconds. Love!

1. Heat oven to 375 degrees and position an oven rack in upper third of oven. Use 1 tablespoon butter to butter a 9-inch round or square baking pan.

2. In a blender, purée cottage cheese, milk, mustard, cayenne, nutmeg and salt and pepper together.

I blended it with about half the milk to start with, to get the cottage cheese really smooth, then added in the rest. Blending without enough milk made my blender shut itself off several times, oops.
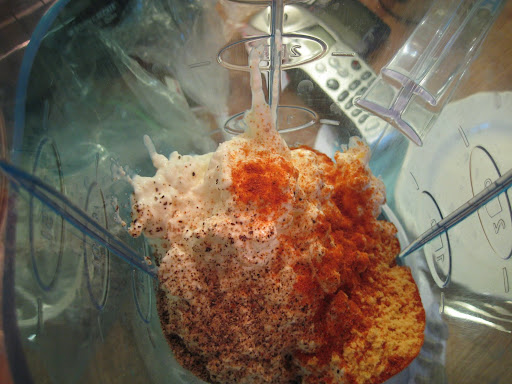
Reserve 1/4 cup grated cheese for topping. In a large bowl, combine remaining grated cheese, milk mixture and uncooked pasta.

Cheese-to-pasta ratio:
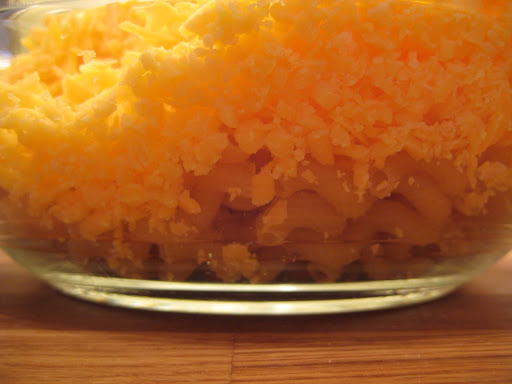
Pour into prepared pan…

Fine, that looks unappealing but it will improve!
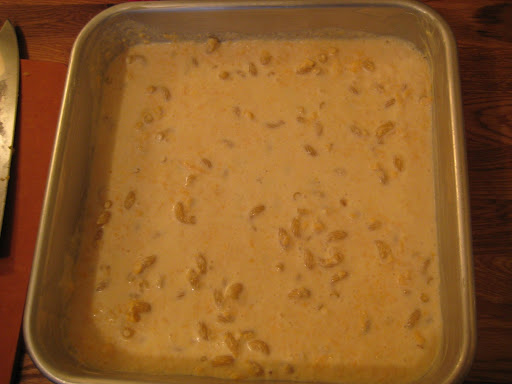
…cover tightly with foil and bake 30 minutes.

Note that it does NOT say to add on the reserved cheese on top before bundling it into the oven. So it should not have looked like this before I covered it tightly and baked it:
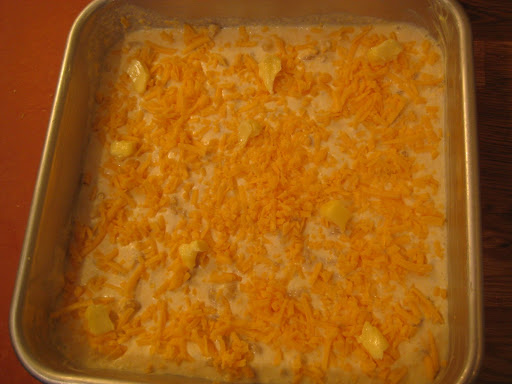
I only realized that once the cheese was on and the thing was in the oven. Too late.

3. Uncover pan, stir gently, sprinkle with reserved cheese and dot with remaining tablespoon butter.

Since I’d already put the cheese on, I tried to stir delicately and leave some cheese still on the top, but I pretty much failed. Oh well.

Bake, uncovered, 30 minutes more, until browned. Let cool at least 15 minutes before serving.

Yield: 6 to 8 servings.
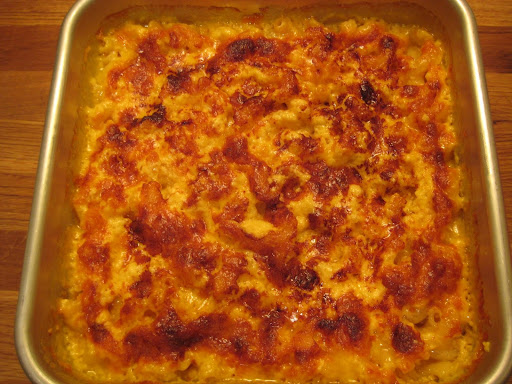
We had large arugula salads on the side to cut the fat. I toasted some walnuts to scatter on top–a favorite combination, since the bitter nuttiness of the arugula goes great with walnuts.

The mac and cheese was very tasty and easy to put together but I’m afraid it didn’t reheat very well–the cheese congeals and the whole thing gets oily, ugh. I think to get a smooth, re-heatable result I’d have to go back to a bechamel technique, no? But if you’re feeding a couple dozen hungry adults (ok, more like 6 or 8…) a pan of this is a nice tasty weeknight dinner. The NYTimes story had an alternate recipe for crusty-toppinged mac and cheese that I might try, or I could try this one again with a topping of breadcrumbs. I am in the crisper-toppings mean better-times camp.

Hopefully it will feel like spring soon, though, and I won’t try out any more heavy mac and cheese recipes until next fall. Please?

Cauliflower ahoy

It’s no news to The Interwebs that Deb at Smitten Kitchen is a failsafe resource when the “what to cook” question gets too pressing–she has a charming style and loads of recipes from all over, all nicely organized and accessible in a print friendly format. What service!

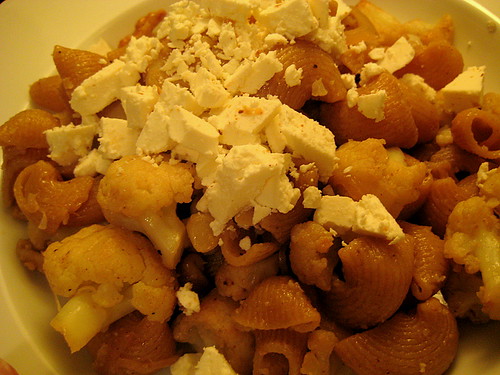
I have turned to her several times in the last couple weeks, beginning with a recipe she posted based on a recipe from Chez Panisse Vegetables. I will try anything with cauliflower; it’s definitely in my top 5 vegetables (a list I should make and cook from some time), and I happened to have walnuts in the freezer and ricotta salata in the fridge, so I took the posting as a sign of what to make that night. The recipe calls for two heads of cauliflower, which is a LOT, guys. A LOT. In the end it was definitely the correct proportion for one pound of pasta, but I ate leftovers for two lunches and a dinner, so next time I’ll be making a half batch. This would feed a crowd. I was out of red pepper flakes and the recipe could have used a little punch, but I’m such a sucker for cauliflower that I’m sure I’ll be making it again soon. I might try it with some *really* good white wheat pasta next time–this would be a good time to call in the $6/bag Rustichella D’Abruzzo stuff–though the whole wheat at least gave some tonal contrast with the cauliflower. I think it would actually be prettier as a shades of cream thing, though.

Click through to Deb’s posting for the full recipe.

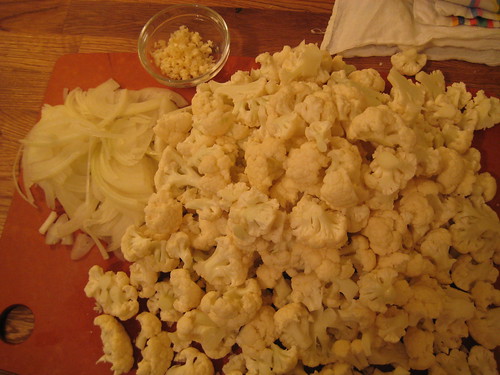
This really is a fast recipe, with the most annoying/time consuming part being the hacking up of 800,000 cauliflower florets. I won’t lie, I’m a dab hand with a cauliflower, thanks to that obsession, but it didn’t give myself enough cutting board space and I felt like I was drowning in the stuff. Next time, half a bag of pasta and one head of cauliflower. But look how lovely those little inner leaves are, all glistening in the dew tap water:

And witness the madness:

If I hadn’t been so lazy and sick of cutting up cauliflower while holding it in my hand because I had no space to put it down (ahem) I would have made the florets a bit smaller or at least more evenly sized so they’d cook in about the same time. It was a beastly task trying to sauté all of that in my biggest pan; the florets didn’t get as caramelized as I would like because there was just too much in the pan. I would also add half again the walnuts; the flavor and texture contrast perfectly with the cauliflower but they were a little scarce on the ground. (Maybe I had freakishly large heads of cauliflower? But they seemed about normal to me.)

Horrible photo of the finished dish; once again I am fighting the cursed lighting in my kitchen:

Definitely worth making again! But maybe not for a little while. I ate a LOT of that pasta.

Saturday with Friends, part 2

Ok you guys. The main dish here was pork loin braised in milk, adapted from Marcella Hazan by Molly Stevens in All About Braising. It’s the second time I’ve made a version of this recipe (the first was from a different book) and I’m still underwhelmed. No more! So instead of focusing on the pork, lets talk about the side dish, which was also from All About Braising.

Fennel Braised with Thyme & Black Olives.

There. It sounds a little random, doesn’t it? But Stevens recommended it with the pork, and I had some fennel in the fridge and figured I might as well buy more in order to use up what I had (this is logical), so off I went.

Fennel Braised with Thyme & Black Olives
Loosely paraphrased from Molly Stevens

Ingredients:
3 large or 4 medium fennel bulbs
(it’s supposed to be about 3 lbs. total; I didn’t have quite that much I don’t think)
3 T olive oil
Coarse salt and black pepper
1/2 cup pitted oil-cured olives
(she suggests Nyons or Moroccan)
2 garlic cloves, minced
5-6 anchovy fillets, minced
1 tsp. chopped fresh thyme
1/2 tsp. fennel seeds, toasted and lightly crushed
1/2 tsp. coriander seeds, toasted and lightly crushed
1/3 c. dry white wine or dry white vermouth
3/4 c. chicken stock


(The spices)


(The minced anchovies: DON’T BE SCARED, it really doesn’t taste fishy in the end. Anchovies are your friends, or so my mother always insists. Speaking of scared, after a speared the fillets out of their little jars and examined them, I called Mom in a panic to find out if I had to remove all trillion tiny bones. No, she said: They dissolve. Whew.)

Preheat the oven to 325 and get out a not-too-large casserole or roasting pan.

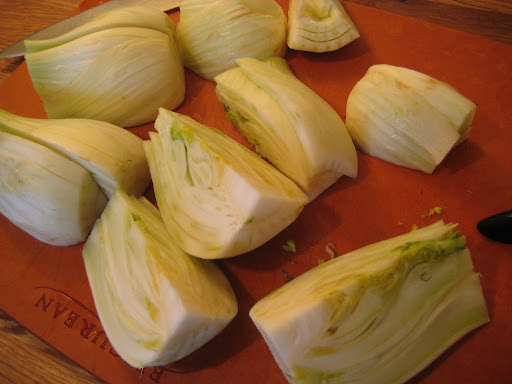
Cut the ferny fronds off the fennel bulbs, right down to where the bulb starts. (I stuck the tops in a vase of water and they’re still very fluffy and pretty a week and a half later.) Quarter each bulb, leaving the core intact. Removing it means your quarters will slide everywhere and not be nearly as pretty!

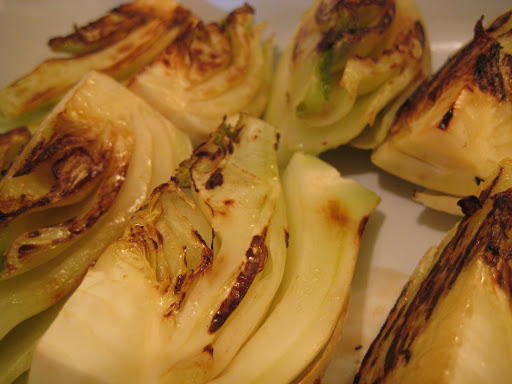
Heat 2 T of oil in a big heavy skillet and brown the cut sides of the fennel quarters. Don’t worry that they brown unevenly. Set the quarters cut sides up in your roasting pan, nestling them snugly together. Don’t use too big of a pan. Sprinkle the olives over them.


(Pre-olives)

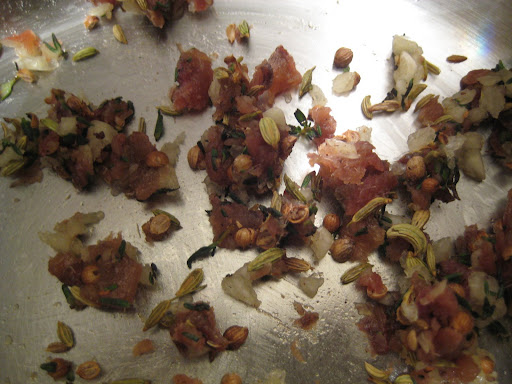
Put the anchovy, spices, thyme and garlic in a small pan and mush them together into a paste.

Add the wine or vermouth, bring to a boil, reduce by half. This smells amazing. Add the stock and bring to a simmer. Pour over the fennel.

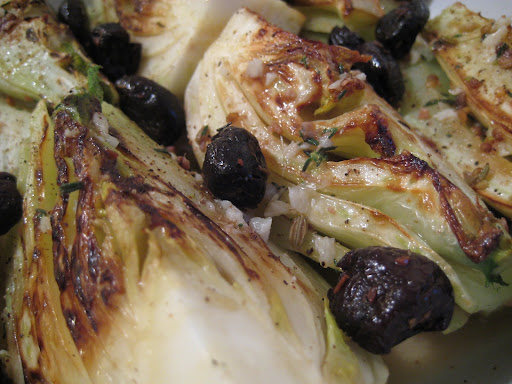
Doesn’t that look smashing? I wanted to eat it right then. Instead:
Cover tightly with foil and braise until the cores are tender when poked with a thin knife, about an hour and 15 minutes. If you saved the fluffy tops you can chop up a couple tablespoons and sprinkle them on top before serving hot or at room temperature. (I forgot to do that.)

Finished and poorly lit, with the pork:

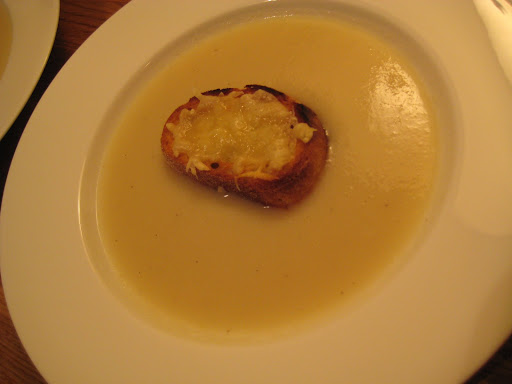
Oh, and before that we had my old standby cauliflower soup (soften a chopped onion in a bit of oil; add in a hacked-up head of cauliflower, cover with stock, simmer 20 minute or so until the cauliflower is soft; puree with an immersion blender until it’s nice and smooth–easiest soup ever):

It was a very neutral-colored meal. Hmm. I loved the fennel–it takes on a texture sort of like bok choy when it’s braised; kind of watery but in a good way. The sharp licorice flavor is WAY tempered. The olives are essential, I was surprised by what a nice strong note they gave each bite. Yum.

Saturday with friends, part 1

We had another dinner party Saturday–this for the professor I worked for in NH, as well as our friend Kabir and Nicole and one of our neighbors. We got a late start that day and I didn’t get to start cooking until 4 or so, agh! I’m going to post in two entries, so there aren’t quite so many photos in each…

Let’s start at the end: Dessert. Since last year I’ve been on the lookout for a really mollasses-y gingerbread recipe. David Lebovitz‘s Fresh Ginger Cake (the recipe is in happy printer-friendly format here at Epicurious) certainly gets great reviews, and I love his blog and hadn’t yet tried any of his recipes, so I thought I’d give it a try. Let’s take a look at the ingredients:

Fresh Ginger Cake
From Room for Dessert, by David Lebovitz
4 ounces fresh ginger
1 cup mild molasses
1 cup sugar
1 cup vegetable oil, preferably peanut
2 1/2 cups flour
1 teaspoon ground cinnamon
1/2 teaspoon ground cloves
1/2 teaspoon ground black pepper
1 cup water
2 teaspoons baking soda
2 eggs, at room temperature

What was that? You don’t know how bulky four ounces of ginger is likely to be? Here, I’ll help you out:

“Kate,” I can hear you saying. “You have guests showing up in a couple hours. Should you have started peeling all that ginger a while ago?”

Yes. Yes, I should have. It TOOK FOREVER.

Position the oven rack in the center of the oven. Preheat the oven to 350°F. Line a 9 by 3-inch round cake pan or a 9 1/2 inch springform pan with a circle of parchment paper.

Peel, slice, and chop the ginger very fine with a knife (or use a grater).

Mmhmm. I grated about half, and the rest had to be chopped, to avoid grating my fingers. I hate peeling and cutting ginger. I love the smell but it’s so time-consuming and annoying. In the photo below, the grated pile is on the left and the chopped pile is on the right. I think grating is better because you don’t get any rogue chunks of ginger that slip through your careful fingers and surprise you later.

By the time I finished the ginger I was panicked about getting the rest of the cake done and baked before I had to start braising dinner, but it did work out ok. More on that later.

Mix together the molasses, sugar, and oil.


In another bowl, sift together the flour, cinnamon, cloves and black pepper.

Bring the water to the boil in a saucepan, stir in the baking soda, [that part is bubbly and fun] and then mix the hot water into the molasses mixture. Stir in the ginger.

Gradually whisk the dry ingredients into the batter. Add the eggs, and continue mixing until everything is thoroughly combined. Pour the batter into the prepared cake pan.

By the way, I got a flat whisk like this for Christmas in my stocking, and it’s fantastic. I highly recommend getting one–it combines things really fast and evenly, and you don’t end up with anything clumped in the middle of the whisk.


Bake for about 1 hour, until the top of the cake springs back lightly when pressed or a toothpick inserted into the center comes out clean. If the top of the cake browns too quickly before the cake is done, drape a piece of foil over it and continue baking.

Cool the cake for at least 30 minutes. Run a knife around the edge of the cake to loosen it from the pan. Remove the cake from the pan and peel off the parchment paper.

My oven (the new Viking) is fritzy, and I think the cake took an hour and a half to bake, and then the edges were more than a little tough. I have to call Viking; the oven temp will drop to 150 while it’s set to 375, etc. It’s nuts.

I served the cake with whipped cream and a few bits of crystallized ginger on each slice.

We had a lot left over (isn’t it a nice tall cake??) and for breakfast I had a slice with some of the extra lemon curd from last week’s tart. The cake is definitely nice with something creamy like whipped cream or the lemon curd, since there is a good ginger bite to it.

I really liked the cake, and I appreciated how incredibly accurate and logical and simple the recipe was. The batter came together really nicely and was fun to make. It’s not the cake I’m looking for, though. I want less of the fresh ginger and more molasses flavor (I was already using dark instead of mild molasses). I might play with the recipe, since I did like the texture of this. Maybe with ground ginger and some allspice for more of a spice cake flavor….?

Getting back in the swing of things

After a long, long hiatus, we finally had friends over for dinner on Saturday. (We were out of town all but two weekends from before Christmas until last weekend. It’s been a busy couple months!) Since I was actually going to be home all day on Saturday and the weather was supposed to be disgusting, I went ahead and tried a new Sunday Suppers recipe: the Boeuf à la Niçoise, served with buttered noodles (with spinach). We started with my old favorite Inoteca Salad (romaine and raddichio with red wine vinaigrette, covered by a mound of ricotta salata). Then the beef and noodles, and finally another old favorite, the Sunday Suppers Meyer Lemon and Chocolate Tart (this was a special request from Ben).

One miscalculation: All the Sunday Suppers recipes are supposed to feed six, and generally with six people there are limited leftovers, if any. We were just four on Saturday and have WAY too much food left over (especially the tart, which gives an easy 8+ slices).

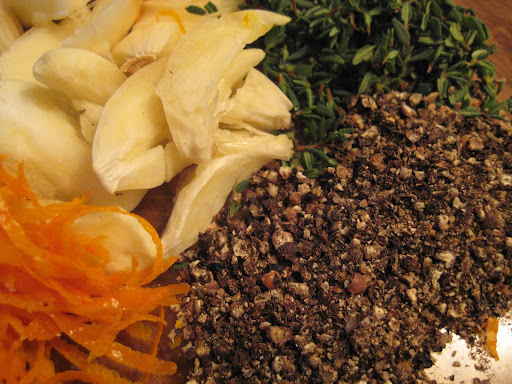
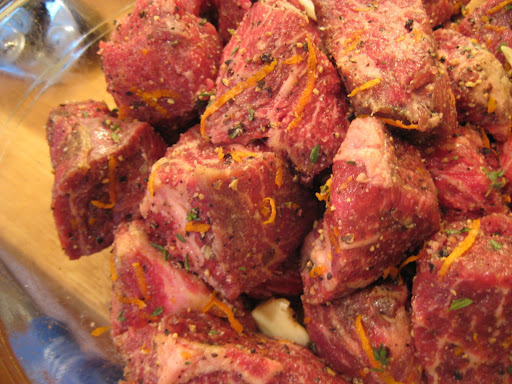
The recipe uses 3 pounds of boneless short ribs instead of the typical chuck roast. After cutting up the strips of meat into nice chunks, they get a rub-down with 1 T pepper, 1 T thyme leaves, zest of 1/2 orange and 6 crushed garlic cloves.

That combination is supposed to hang out overnight, but despite a completely annoying after-work-before-movie shopping trip on Friday night so I’d be able to prep the meat, I completely forgot when we got home, and had to do it in the morning, about six hours before cooking. Oops!

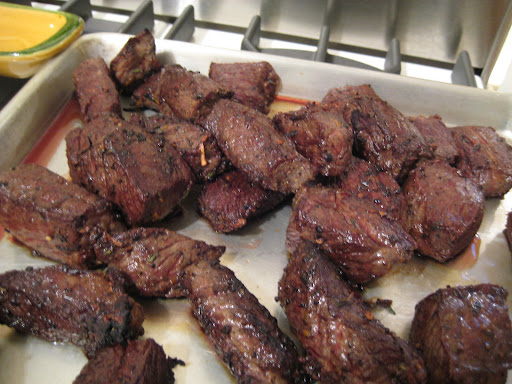
The meat (with the garlic and orange brushed off, to be added back in later) gets thoroughly seared (heat the dutch oven for three minutes; add in a few tablespoons of olive oil, let that heat for another couple minutes before adding a bit of the meat at a time, in batches. This is a smoky process, so open a window…):

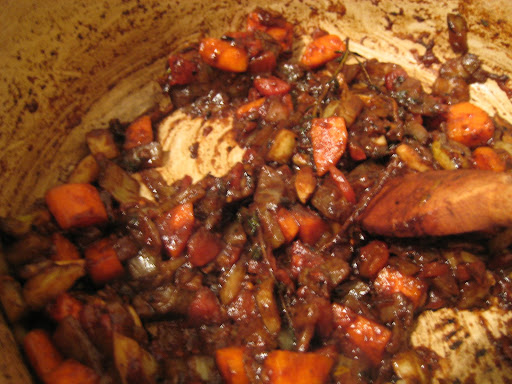
And then diced vegetables– 1/2 cup each of carrot and fennel and 1 cup of onion, plus six sprigs of thyme–caramelize a bit in the messy, messy pot, then the reserved garlic and orange zest go in. I include this photo, taken once I’d added in 3/4 cup crushed San Marzano tomatoes and a quarter cup of balsamic vinegar to cook down into a glaze, because cooking isn’t always pretty. There are blackened pots and crappy-looking steps as well as softly-lit final presentations or gleaming raw ingredients!

In go two and a half cups of good red wine, to reduce down, and then four cups of beef stock (bring to a boil), and then the meat. On with some tinfoil (NO PLASTIC WRAP, despite the recipe!) and the lid and into the oven at 325 for three hours.

Part two:
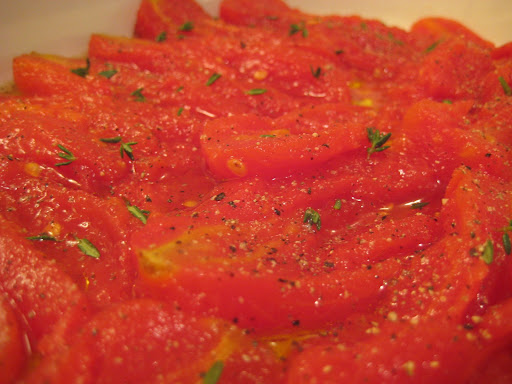
You’re supposed to use San Marzano tomatoes again here, but I couldn’t get whole ones without basil, etc. added in, so I used plain Muir Glen. Cut 8 good canned tomatoes in half and place in a small baking dish (put a couple T of olive oil in the dish first), cut side up. Sprinkle with 1 T thyme, salt and pepper, and put in the oven with the beef for an hour and a half.

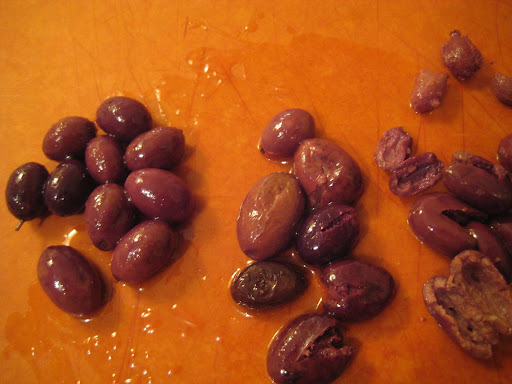
At some point while things are roasting, pit 1/2 cup of Niçoise olives (they’re tiny!) by crushing them with the flat of your knife and then picking the pits out:

Also clean 4 oz. of baby spinach and set aside, and get a pot of salted water boiling and then turn it off so it won’t take forever to boil when you need it!

Part three:
When the beef is done, remove it from the oven, uncover it (make sure the beef is meltingly tender, if it’s not back to the oven with you!) and ladle half the juices out into a big pan. Crank the oven to 400 and put the meat back in for 15 minutes.

Bring that water back to a boil and cook 3/4 pound of pappardelle, a little underdone.

Add the olives to the braising juices and then add in the pasta, toss and bring to a low simmer. Add in 6 tablespoons of butter. (I know! You should see the recipe for the lemon tart!), stir in the spinach and 1/4 cup of chopped parsley, and serve, tucking the roasted tomatoes in around the chunks of meat.
Salad:

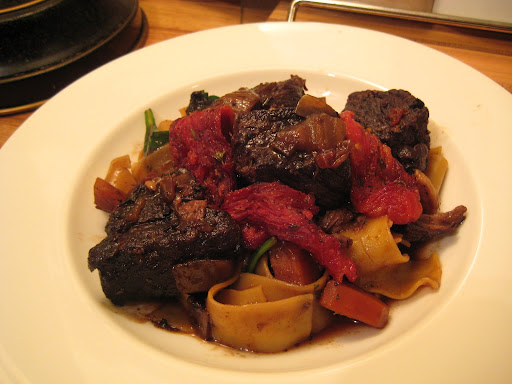
Dinner:

The short ribs make this so, so tender and delicious. I was really tired and not that hungry by the time we ate, but the flavors here were great and the dish was a very big hit at the table.

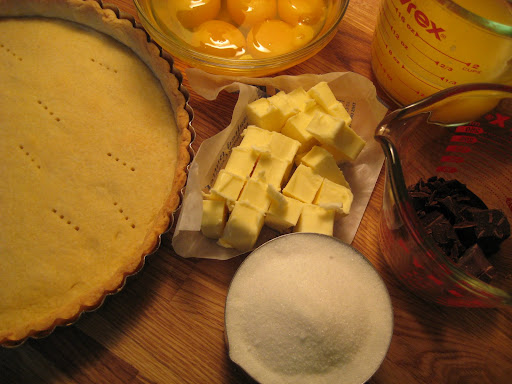
Dessert:

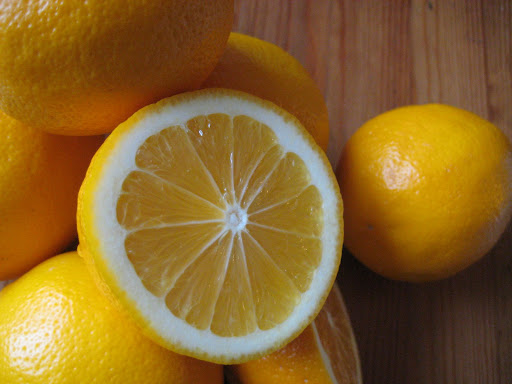
This was the first time I got to use Meyer lemons instead of regular–they had loads of gorgeous ones at Whole Foods, so I took advantage.

For the record, Meyer lemon on the left, regular on the right:

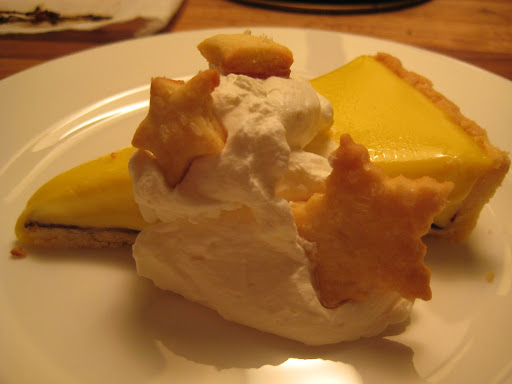
My tart pan is randomly 9″ instead of 10″, so I always have lots of extra tart dough. I made little stars to munch on and stick on the tart:

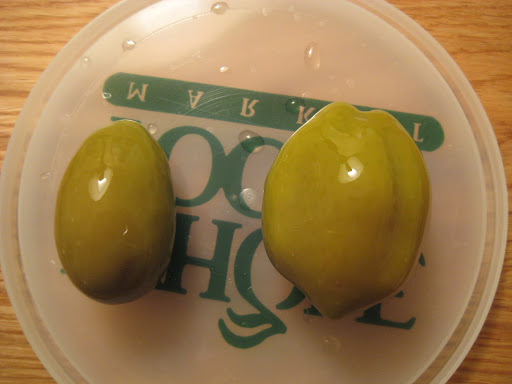
Oh, and for good measure here is the Olive That Ate the World, discovered before dinner:

Roasted chicken, second try

Why can’t I roast chicken without freaking out? The first time I tried, in December of 2006, was so traumatic that I never did it again. After taking a year to recover, I finally tried again a week or two ago, and once again didn’t have the best of luck, despite a tasty outcome.

I saw Zuni Cafe’s salt-roasted chicken technique on AT’s The Kitchen and thought it looked great and easy. I acquired a small chicken. I gave it a nice salt massage and stuck packets of herbs under the skin, as directed. I may have stuck those packets under the skin on the wrong side of the chicken, I’m still not sure.

I let it sit overnight in the fridge, and followed all the cooking directions (except, possibly, putting the chicken right-side up to begin with?)… I flipped it one extra time when I decided it was upside down, but that can’t account for it taking 20 extra minutes to cook, can it?

I did a bad job of cutting the poor thing up, but the meat was juicy and flavorful–I will definitely try the salt rub again. I honestly think part of my problem is with the new stove–the oven temperature varies wildly (last night I had it on 325 and it was going from 250 to 350, and I wasn’t opening the door). I will call Viking this week to see if they need to calibrate it or something.

I sauteed broccoli and marinated cherry tomatoes in vinaigrette, and made some israeli couscous (Ben’s favorite) to go with the chicken.

Help me stop being so scared of whole chickens! I’m very tempted to just start buying the rotisserie ones, all nicely cooked for me.

Fast and easy

More than a year ago, when I was young, I blogged about Mark Bittman’s “Cheesy Pasta,” a quick recipe he ran in the Times. I made it again last week and it’s still quick and easy and good, though I still am not the world’s most enthusiastic lover of gorgonzola.

Pretty, though:

(That’s gorgonzola, grape tomatoes, chopped arugula and a cup of milk/cream.)

Since this literally comes together in less time than it takes to boil the water and cook the pasta, it’s a great weeknight alternative to cracking open a jar of sauce. I want to try out some different types of cheese in it, and I’d use more arugula than the recipe calls for, since it wilts down very small.

Other fast things I’ve been preparing for dinner lately:
-Salad with TJ’s frozen pizza (Total prep time: 15 minutes to pre-heat oven, 10 minutes to bake)
-TJ’s Lentils Punjabi with a package of naan (Total prep time: 2 minutes in the microwave; 4 minutes in toaster oven for the naan)
It’s been busy times, kids. HOWEVER. I am reading The Omnivore’s Dilemma, which pretty much just coincides with everything my mom did anyway when I was growing up, in terms of local farmer’s market produce and the least industrial meat available and a balanced diet with animal protein only a few times a week, etc. It does make me even more paranoid about what I’m buying, though, which I actually don’t need. As a result I’m frozen in place and can’t figure out what to buy *at all,* and am pretty much sitting on my hands and wondering when CSA sign-up time is. Gah.

The computer is still broken. I haven’t had a chance to take it in for a check-up.

I’m brooding over shallots, onions and pancetta; there is a pasta recipe brewing in my head. Also there is beef stew in the slow cooker at home, and I have one more dinner’s worth of food photos uploaded to post soon! Sorry for the slow period…

Experimental quesadillas

In an attempt to branch out and due to menu planning on the fly at Trader Joe’s while on the phone with my mom, I decided to make chicken quesadillas for dinner one night last week. I bought:
-A packet of small corn tortillas
-A package of chicken tenders
-Grated cheese
-Guacamole (which comes in two clever little sealed packets so you don’t open a whole pound at once)
-A container of “Salsa makings” or something along those lines, containing two shallots, three roma tomatoes, one lime, one jalapeño and a couple cloves of garlic

Once I got home I made salsa using the tomatoes, too much shallot, about two-thirds the juice of the lime, a tiny tiny tiny amount of the jalapeño, and salt (we are both spicy-food wimps and I hate cilantro—not the makings of stellar salsa…). I used the cuisinart stick blender’s mini-prep attachment (which I think I may have later ruined by stupidly tossing the top part (not the stick blender, but the dome that connects the blender to the bowl) in the dishwasher, eek!) to dice up the shallots very, very fine—it worked great.

12 seconds later:

The salsa was only so-so—too much shallot and not enough lime? Also the tomatoes were as blah as you’d expect in February; I don’t know what I was thinking.

I used a bit of the chopped shallot to make a lemon vinaigrette for salad, and put the salsa and salad dressing to the side. Next I made a marinade for the chicken, trying to remember what my mom had told me over the phone. I used the rest of the lime juice, some lemon juice, a bunch of the shallot, a little brown sugar, a couple slices of the jalapeño, and a bit of oil. I cut the chicken tenders into small pieces and marinated them for about 15 minutes (as Mom warned, they will cook in the citrus, like ceviche, if you marinate too long!).

I sautéed the chicken in a nonstick pan—I drained off as much marinade as I could but I didn’t mop the chicken off or anything, and the marinade bubbled up a lot and then caramelized on the chicken, which was tasty.

I set the chicken (a little undercooked so it wouldn’t dry out) to the side and heated up our big griddle. I didn’t get quite the right heat/time balance to make the quesadillas crispy and melty but not tough. I always used to use flour tortillas, which get crunchy but not so hard if you leave them on the heat too long. The corn ones definitely require different timing.

We ate the tortillas with the salad, salsa and guacamole. I’ll try again soon, but I had forgotten that I really don’t love anything but cheese in quesadillas. Maybe I’ll do soft tacos instead?

~~~

BTW, I’m writing this post on the Acela from NYC to Boston. I’m online thanks to a tip from a co-worker—turns out you can get t-mobile to help you set up your computer to use an internet-enabled cellphone (I have a blackberry pearl) as a modem. Amazing!!!! I’m headed home after a wonderful weekend with my dear friend Bridget (who is moving to London next week—good luck, Bridge!). Friday night I got to NY at 9-something and we met at the Spotted Pig, where we only had to wait an hour and devoured the amazing burgers. Next time I don’t think I’ll bother on a weekend—the crowd was dense and not our scene as the night went on—but the burger was amazing and I’ll definitely go again on a weeknight.

Good stuff: Lemon pepper pappardelle

I made a variation on this back in October (complete with stunningly ugly photo), but I thought I’d post this anyway, especially since it’s the first time I’ve used the new mini-photo studio I got for Christmas.

This is a quick weeknight meal. I started with Trader Joe’s lemon pepper pappardelle, which I’d read about on Apartment Therapy’s The Kitchen last fall. It has a bright lemon flavor and good pepper kick, which makes it worth buying, to me, despite my dislike of long, flat pasta. (Hard to eat! Sticks to itself!)

I cut up two small pieces of broccoli, lopping the florets off and slicing each one lengthwise into two or three sheets. I peeled the stems and then shaved them into ribbons with a vegetable peeler.

I sautéed those in a bit of olive oil, starting with the florets, leaving them undisturbed for long enough to caramelize a bit, then tossing in the ribbons towards the end. The broccoli got nice and crispy in some parts and wasn’t overcooked; I had to be careful not to eat it all plain. Next time I think I’ll make it as a side dish and just squirt a little lemon juice over the bowl.


(Photo taken in the regular lighting of the kitchen, not the interesting light box where the rest of these were taken.)

Meanwhile Ben grilled some sausages and sliced them up. When the pasta was cooked I tossed it with a bit of olive oil, then with the broccoli florets and ribbons, and topped it with feta and the sausage.

I can tell I’m really ready for spring because whenever I think about what to cook right now, I think of bright and light colors. I don’t want anything heavy or stewed, even though I didn’t do any braising this whole winter. I’ll have to get over that, especially since after two days of temperatures in the 50s and 60s, and a lovely sunny afternoon, I noticed as I walked back to my office to write this a little while ago that it was suddenly snowing hard. And blowing sideways. Hmm.

Valentine’s fondue

I decided to make cheese fondue for dinner last night. I don’t think I’ve ever actually eaten fondue, though I always meant to and loved the idea. And all last year in Hanover I meant to break out the fondue pot but never got around to it. I used a recipe from Epicurious that had lots of happy reviews, a Three Cheese Fondue made with champagne. (I used prosecco.)

The recipe called for Gruyère, Emmenthal and a bit of brie, plus shallots, cornstarch, lemon juice, champagne and a bit of nutmeg and white pepper.

I used the cheese grater in the Cuisinart for the first time–now that we have a dishwasher I’m trying to get over my Cuisinart-Avoidance Complex (all those fussy little pieces to wash!). Oh my GOD. It literally took 20 seconds to perfectly grate all the cheese (not the brie, obviously). Amazing.

I used prosecco that was already in the fridge, since I figured it would be nice to drink with the fondue.

I cooked the mixture on the stove since I’d never used the fondue pot and I’d bought the wrong size sterno can (sigh) and I just didn’t know if it would really cook. I think it would have and it would have been more fun to do the cooking in the pot in front of the fire. Not scenic, though. The mixture looks super gross when you add the cheese in to the shallots and champagne:

It did thicken up nicely, and I transferred it to the glass insert for the fondue pot (which is fussy and hard to get in and out of those handles):

Then put it over the hot water in the metal part of the pot, and set the whole thing up on my pretty new yellow tray (ugh, nice shot.):

We ate it with a big salad straight from the bowl, and the champagne, in front of the fire. It was a bit warm for all that hot cheese and hot fire, but fun to picnic!

I’d planned to make fancy hot chocolate with real whipped cream for dessert, but we were too full. Another time!